If you’re serious about keeping your cryptocurrencies safe, a hardware wallet is a must-have. Among the most secure options available, TREZOR stands out. In this tutorial, I’ll guide you through the process of setting up your TREZOR hardware wallet for the very first time.
Contents
- 1 Inside the Box
- 2 Setting up TREZOR
- 2.1 Step 1: Connect TREZOR to Your Computer
- 2.2 Step 2: Go to trezor.io/start
- 2.3 Step 3: Install TREZOR Wallet
- 2.4 Step 4: Install Latest Firmware
- 2.5 Step 5: Reconnect TREZOR
- 2.6 Step 6: Give Your TREZOR Device a Name
- 2.7 Step 7: Setting up the PIN
- 2.8 Step 8: Write Down the Recovery Seeds
- 2.9 Final Step: Enter PIN to Access TREZOR Wallet
- 3 FAQs
- 4 Conclusion
Inside the Box
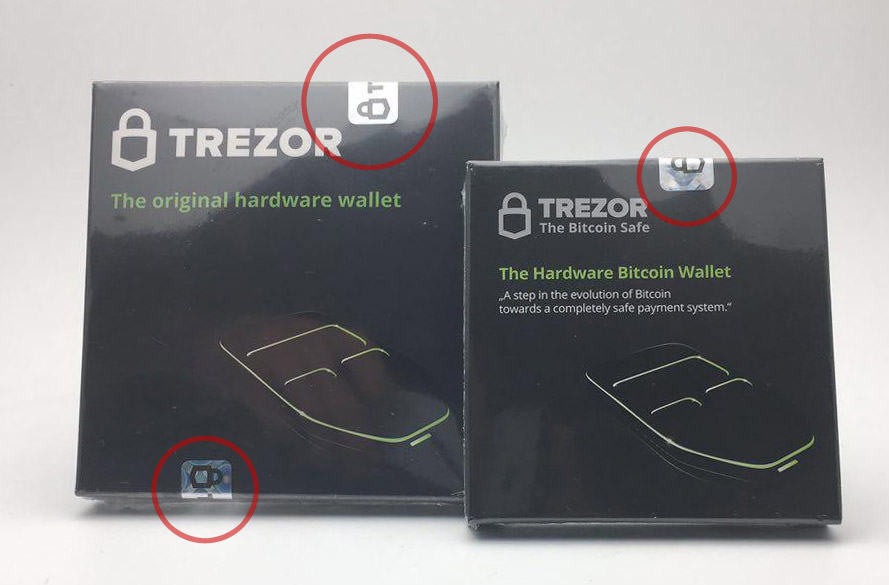
Before we dive into the setup process, let’s take a look at what you’ll find inside the box. Make sure to check the security seal on the box; if it’s tampered with, contact TREZOR support immediately. Here’s what you’ll get:
- TREZOR hardware wallet
- Recovery Seed card
- Lanyard
- Instruction paper
- USD to Micro USB cable
Setting up TREZOR
Setting up your TREZOR for the first time is straightforward and should only take about 10-15 minutes.
Step 1: Connect TREZOR to Your Computer
Start by connecting your TREZOR wallet to your computer using the provided USB cable. On your TREZOR wallet’s screen, you’ll see a lock icon and an instruction asking you to go to trezor.io/start.
Step 2: Go to trezor.io/start
Visit trezor.io/start to learn how the TREZOR PIN and recovery seed work. Choose if you want to subscribe to their newsletter, then proceed to set up your device.
Step 3: Install TREZOR Wallet
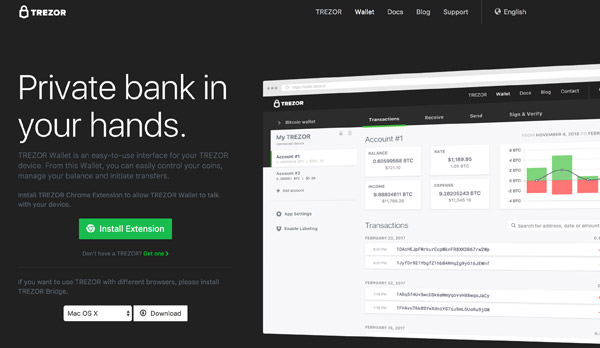
If you’re not automatically directed there, go to wallet.TREZOR.io. To enable communication between your TREZOR device and your TREZOR wallet, you can install the TREZOR Chrome Extension or the TREZOR Bridge designed for your operating system. For this guide, we’ll use the Chrome Extension.
Step 4: Install Latest Firmware
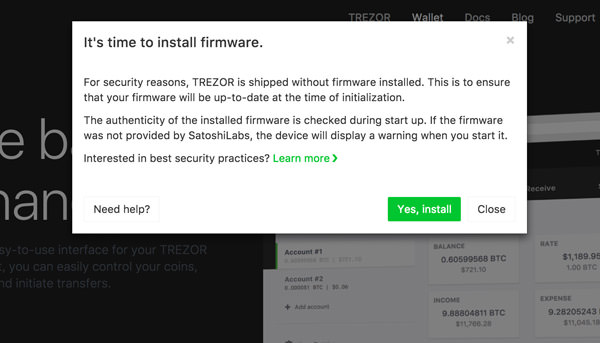
For safety reasons, TREZOR devices are shipped without firmware. Click “Yes, Install” to begin the firmware installation process. Make sure the firmware fingerprints on your browser screen match the ones displayed on your TREZOR.
Step 5: Reconnect TREZOR
Unplug your TREZOR device, plug it back in, and go to wallet.TREZOR.io.
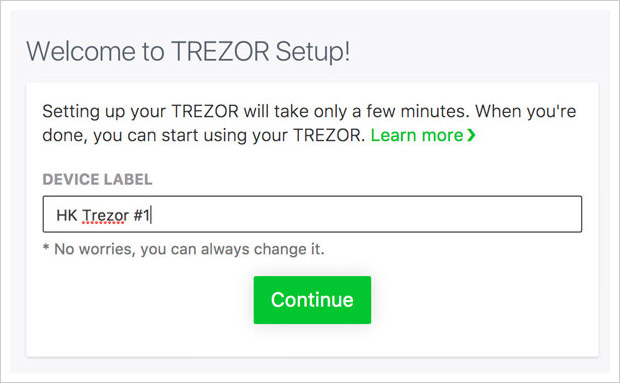
Step 6: Give Your TREZOR Device a Name
Step 7: Setting up the PIN
Setting up your PIN might seem confusing at first, but it’s actually quite simple. Your browser will display a 3×3 grid with dots, while your TREZOR will show a 3×3 grid with numbers. To set your PIN, refer to the position of the numbers on your TREZOR and enter them in sequence on your browser. Repeat this process to confirm your PIN.
Step 8: Write Down the Recovery Seeds
Your TREZOR will display a unique combination of 24 words. These words are crucial for recovering your accounts if you lose your device. Write down all 24 words on the recovery seed card provided. Verify the words and click Finish on your TREZOR. Remember to keep your recovery seed card safe at all times.
Final Step: Enter PIN to Access TREZOR Wallet
Go to wallet.trezor.io on your browser, enter your PIN, and hit enter to access your wallet for the first time. It should look something like this:
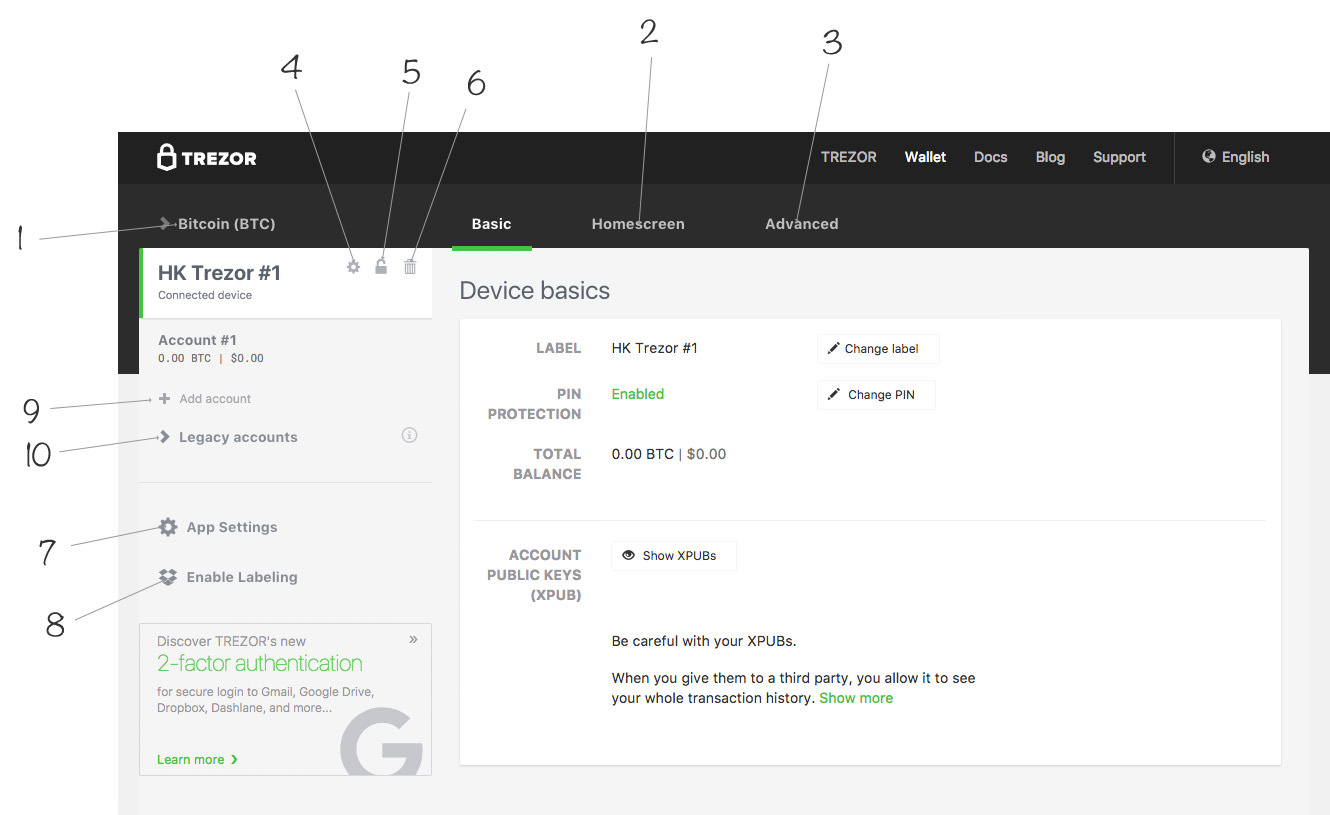
Now you’re all set! You can explore various features, such as accessing other cryptocurrency wallets, customizing your TREZOR device’s homescreen, and managing security settings.
FAQs
Q: What cryptocurrencies does TREZOR support?
A: TREZOR currently supports Bitcoin, Bitcoin Cash, Dash, Litecoin, Zcash, Ethereum, and Ethereum Classic.
Q: How can I access security features in TREZOR?
A: You can enable or disable features like passphrase and PIN, as well as wipe your TREZOR device (removing all information), in the security settings section of your TREZOR wallet.
Q: Can I connect TREZOR to Dropbox?
A: Yes, you can connect your TREZOR device to Dropbox to access additional features and information, such as renaming accounts and adding comments to transactions.
Conclusion
Setting up your TREZOR wallet for the first time is a crucial step towards securing your cryptocurrencies. By following these simple instructions, you’ll have a reliable and secure hardware wallet protecting your digital assets. Remember to store your recovery seed card in a safe place and never share it with anyone. Happy investing!


